Description
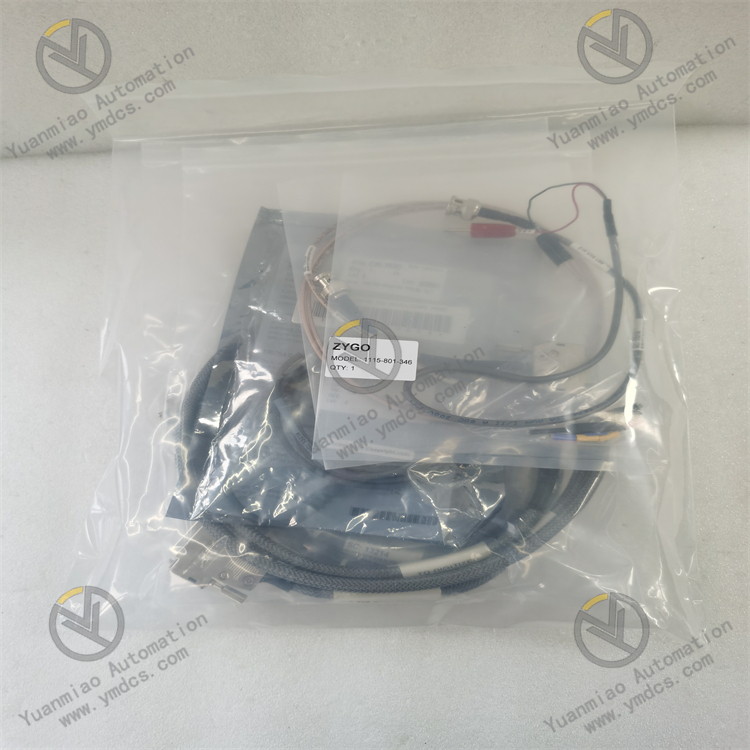
Zygo 1115-801-346
I. Overview
Zygo 1115-801-346 is a product with important application value in the field of high-precision measurement. Zygo has a profound foundation in laser interferometry technology. As early as 35 years ago, it commercialized laser interferometers. Over the years, it has continuously led the development of surface shape metrology technology. Thousands of laser interferometers produced by Zygo are widely used worldwide, providing guarantee for the accurate production and measurement of optical components and assemblies, covering consumer electronics, ophthalmology, semiconductors, national defense, aerospace and many other industries, and are highly trusted in the global optical metrology field. As a member of the company's product line, 1115-801-346 inherits Zygo's excellent technical genes and is specially designed to meet specific high-precision measurement needs.
II. Technical Parameters
Measurement principle and accuracy: Based on the advanced laser interferometry principle, it can achieve extremely high measurement accuracy. It can accurately detect tiny displacements, vibrations and changes in surface topography with a precision of nanometer level. For example, in the measurement of the surface flatness of optical lenses, it can accurately distinguish extremely subtle concave-convex deviations, providing key data support for the high-quality manufacturing of optical components.
Measurement range: It has a wide measurement range and can be adapted by adjusting relevant parameters according to different measurement scenarios and application requirements. When measuring linear displacement, it can cover the measurement range from tiny displacement to relatively large distance, meeting the needs of various scenarios such as part displacement monitoring in precision machining and worktable movement range measurement in semiconductor manufacturing equipment.
Data acquisition frequency: It supports high-frequency data acquisition and can quickly obtain a large amount of measurement data. In some scenarios with high requirements for dynamic measurement, such as vibration measurement, it can collect data at an extremely high frequency, reflecting the dynamic changes of the measured object in real time, and providing sufficient data basis for analyzing vibration characteristics and evaluating equipment operation stability.
Interface type: Equipped with a variety of standard interfaces, it is convenient to connect with other devices and transmit data. Common interfaces include Ethernet interface, which can realize high-speed and stable data transmission, facilitating the real-time upload of measurement data to computers or other data processing equipment; at the same time, it may also have serial interfaces such as RS-232/RS-485, which are used to connect with some devices that have relatively low requirements for communication rate but need long-distance transmission, enhancing the compatibility and flexibility of the product in different system integrations.
Environmental adaptability parameters: In terms of operating temperature range, it can adapt to a wide temperature range, generally able to work stably in an ambient temperature of - [X]°C to [X]°C, ensuring normal use in different climatic conditions and industrial environments. It also has a certain tolerance range for humidity environment, and can run reliably in an environment with relative humidity of [X]% to [X]%, reducing the impact of environmental humidity changes on measurement accuracy and ensuring the smooth progress of measurement work in various complex environments.
III. Functional Features
High-precision measurement function: The core function is to provide ultra-precise measurement results. Through precise laser interferometry technology, it can conduct meticulous detection of the measured object. In the semiconductor chip manufacturing process, it can accurately measure the displacement accuracy of key components in chip manufacturing equipment, ensure the accuracy of the chip manufacturing process, and improve the yield and performance of chips.
Real-time monitoring and feedback function: It can monitor the state changes of the measured object in real time and feed back the measurement data in a timely manner. In the automated production line, it can monitor the size changes and position deviations during product processing in real time. Once an abnormality is found, it can immediately issue an alarm and feed back to the control system, so as to adjust production parameters in time to ensure the stability and consistency of product quality.
Multi-parameter measurement function: It can not only measure a single physical quantity, but also measure and analyze multiple related parameters at the same time. For example, when measuring optical components, it can obtain multiple parameters such as surface flatness and radius of curvature at the same time, providing rich data information for a comprehensive evaluation of the quality and performance of optical components, and reducing the time cost and measurement error caused by measuring different parameters separately.
System integration convenience: Due to its various standard interfaces and good compatibility, it is easy to integrate with other equipment and systems. When building a large-scale precision measurement system, it can be conveniently connected with upper computers, data acquisition cards, motion control equipment, etc., forming a complete and efficient measurement and control system, providing strong technical support for complex industrial production and scientific research projects.
Data analysis and processing function: The product may have built-in certain data analysis and processing algorithms, which can preliminarily process and analyze a large amount of collected measurement data. For example, filtering and statistical analysis of measurement data to extract key information, providing users with intuitive and useful measurement reports, helping users quickly understand the status and performance of the measured object, and reducing the workload of users' later data processing.
IV. Application Fields
Semiconductor manufacturing field: It is widely used in the entire process of semiconductor manufacturing. From the measurement of wafer surface flatness during wafer manufacturing, the high-precision displacement monitoring of the lithography machine workbench in lithography equipment, to the high-precision alignment measurement between the chip and the substrate in the chip packaging process, Zygo 1115-801-346 plays a key role, ensuring that the high-precision requirements in the semiconductor manufacturing process are met, and providing a guarantee for improving the quality and performance of semiconductor products.
Optical component manufacturing and testing field: It is crucial for the manufacturing and testing of optical components such as optical lenses and reflectors. In the processing of optical components, it can monitor the processing accuracy of the component surface in real time, find and correct processing errors in time, and ensure the high-quality production of optical components. In the quality inspection of optical components, it can accurately measure various parameters of optical components, such as surface roughness and surface shape error, providing an accurate basis for the quality grading and screening of optical components, and is widely used in the manufacturing process of various optical products such as telescopes, microscopes and camera lenses.
Precision machinery manufacturing field: In precision machinery manufacturing equipment such as precision machine tools and automated production lines, it is used to monitor the motion accuracy of key components of the equipment. For example, measuring parameters such as the displacement accuracy of the machine tool workbench and the straightness of the guide rail. Through real-time monitoring and analysis of these parameters, it provides data support for equipment debugging, maintenance and precision optimization, improves the accuracy and stability of precision machinery manufacturing, and meets the strict requirements of industries such as aerospace and automobile parts manufacturing for precision machining.
Precision measurement research field of scientific research institutions: In research projects involving ultra-precision measurement carried out by scientific research institutions, such as the measurement of material microstructure and nanotechnology research, Zygo 1115-801-346, with its high-precision measurement characteristics and rich functions, can meet the strict requirements of researchers for measurement equipment, help researchers obtain accurate and reliable measurement data, and promote the in-depth development and technical breakthroughs of related scientific research projects.
Medical equipment manufacturing field: In the manufacturing of medical equipment, for some equipment with extremely high precision requirements, such as ophthalmic surgical equipment and medical imaging equipment, this product can be used for precision measurement and control in the manufacturing and assembly process of key components of the equipment. For example, in ophthalmic surgical equipment, it ensures the high-precision positioning of the laser emitting device, improving the accuracy and safety of the operation; in medical imaging equipment, it ensures the high-precision assembly of imaging components, improving the clarity and accuracy of images, and providing technical guarantee for the high-quality manufacturing of medical equipment.
V. Common Faults and Solutions
Decreased measurement accuracy:
Fault phenomenon: The accuracy of the measured data is significantly lower than the nominal accuracy of the equipment, and the measurement results have large deviations.
Possible causes: The laser interference optical path is polluted or damaged, such as dust and debris in the optical path blocking the laser beam, or optical lenses have scratches and wear, affecting the laser interference effect; the measurement environment has changed greatly, such as sharp fluctuations in temperature and humidity, exceeding the normal working environment range of the equipment, causing thermal expansion and contraction of internal parts of the equipment or water vapor condensation, affecting measurement accuracy; after long-term use of the equipment, the internal calibration parameters have drifted and need to be recalibrated.
Solutions: Clean and inspect the laser interference optical path, use professional optical cleaning tools to remove dust and debris in the optical path, carefully check the optical lenses, try to repair if there are slight scratches, and contact Zygo manufacturer to replace the lenses if the damage is serious; improve the measurement environment, control environmental parameters such as temperature and humidity within the normal working range of the equipment, and adjust the environment by installing air conditioners, dehumidifiers and other equipment; according to the requirements of the equipment operation manual, recalibrate the equipment with standard calibration instruments to restore the measurement accuracy of the equipment.
Abnormal data transmission:
Fault phenomenon: Data transmission between the equipment and external equipment is interrupted, packet loss or transmission speed is too slow, affecting the normal collection and processing of data.
Possible causes: Poor connection of data transmission lines, such as loose interfaces, damaged data lines, etc.; the communication interface driver is not installed correctly or fails; unstable network environment (if network transmission is adopted), with network congestion, signal interference, etc.
Solutions: Check the connection of the data transmission line, re-plug the interface to ensure a firm connection, and replace the data line with a new one if it is damaged; check the communication interface driver in the device management, and if there is a problem, uninstall and reinstall the latest version of the driver; for network transmission problems, check the working status of network connection devices (such as routers, switches, etc.), optimize network settings, avoid peak network usage, or use wired network connection instead of wireless network connection to reduce signal interference and improve network stability.
The equipment cannot start normally:
Fault phenomenon: After turning on the power of the equipment, the equipment has no response and cannot start normally.
Possible causes: Power supply failure, such as damaged power cord, faulty power adapter, short circuit in the internal power circuit of the equipment, etc.; internal hardware failure of the equipment, such as damaged motherboard, burned key chips, etc.; equipment software system failure, such as damaged operating system, missing startup program, etc.
Solutions: First, check the power supply part, replace the power cord or power adapter, use a multimeter and other tools to detect whether there is a short circuit in the internal power circuit of the equipment, and if there is a short circuit, repair or replace the relevant circuit components; if the power supply is normal, contact Zygo professional technicians to conduct a comprehensive inspection of the internal hardware of the equipment with professional testing equipment, determine the faulty hardware and replace it; for software system failures, try to use the system repair tools provided by the equipment or reinstall the operating system and related software to restore the normal startup function of the equipment.
Large fluctuation of measurement data:
Fault phenomenon: The measurement data fluctuates irregularly within a certain range, and stable measurement results cannot be obtained.
Possible causes: The measured object itself has vibration or unstable factors, which interfere with the measurement process; there are strong electromagnetic interference sources around the equipment, affecting the stability of the laser signal; the performance of the equipment's sensor decreases, and the collection and processing of measurement signals are abnormal.
Solutions: Fix and stabilize the measured object, such as adding shock absorption devices and optimizing the installation method, to reduce the vibration and unstable factors of the measured object itself; check the environment around the equipment, eliminate strong electromagnetic interference sources, such as keeping away from large motors, transformers and other equipment, or take electromagnetic shielding measures for the equipment; contact Zygo manufacturer to detect and calibrate the sensor of the equipment. If the sensor performance decreases seriously, replace it with a new sensor to ensure the stability of the measurement data.


