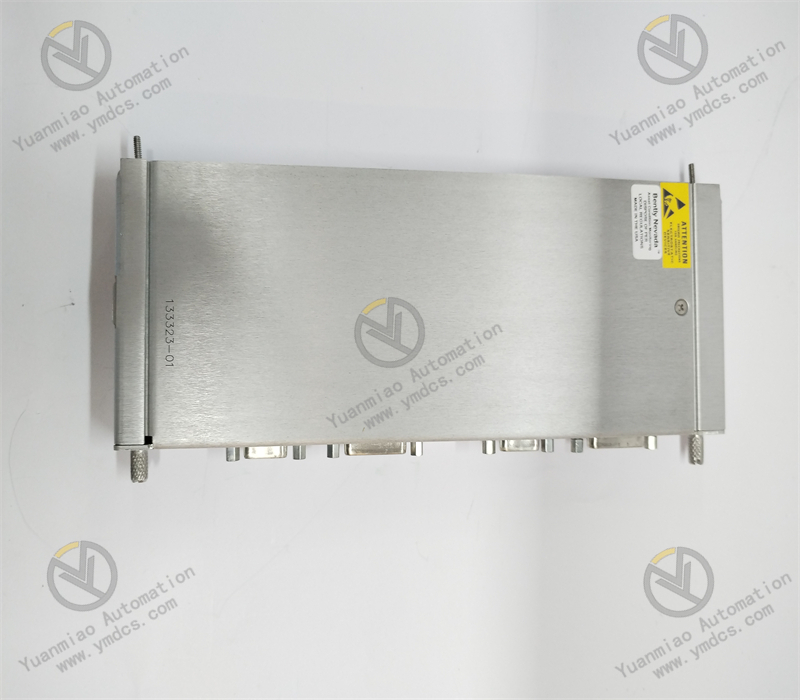
Description
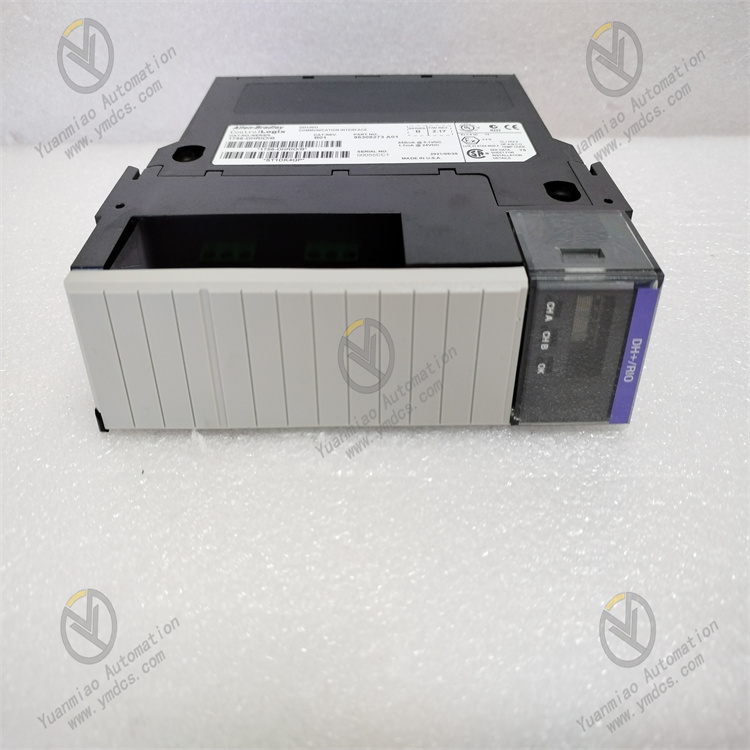
The Allen - Bradley 1756 - DHRIO is a high-density remote input/output (I/O) module. It can provide a large number of digital input/output points for the system, enabling remote I/O connection in a distributed control system architecture and achieving flexible system configuration and expansion.
Main Features
High-density Design: The design of this module allows a large number of I/O points to be integrated within a limited space. This can reduce the space occupied by the control cabinet and lower the system cost.
Remote Communication: It supports remote communication with the main controller. Through networks such as industrial Ethernet, it can transmit the data of remote field devices to the main controller and, at the same time, receive the control instructions from the main controller, thus realizing the monitoring and control of remote devices.
High Reliability: Designed in accordance with industrial-grade standards, it has good anti-interference ability and stability and can operate stably in harsh industrial environments.
Flexible Configuration: Users can flexibly configure the number of input/output points and types (such as digital input, digital output) according to actual needs to adapt to different application scenarios.
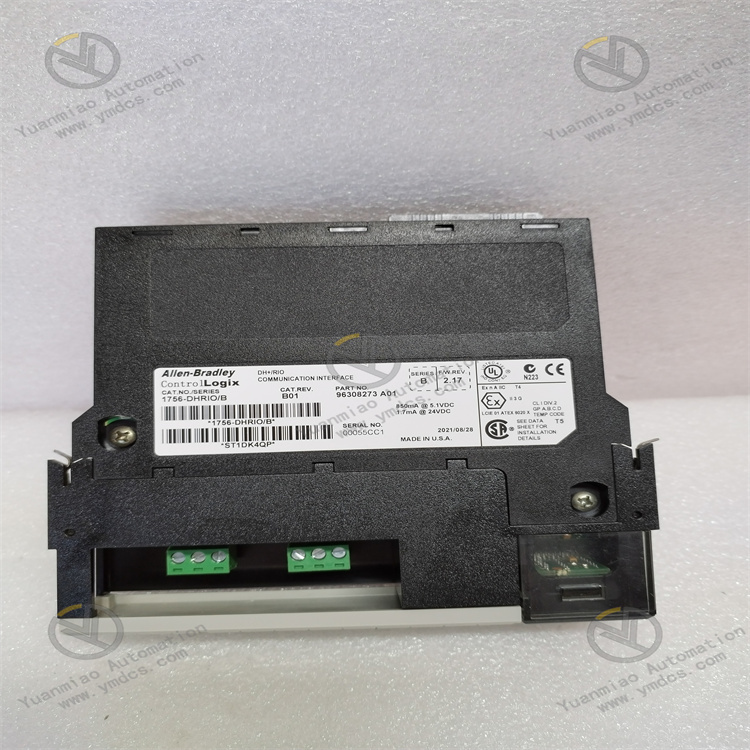
Technical Specifications for 1756-DHRIO
| Manufacturer | Rockwell Automation |
| Brand | Allen-Bradley |
| Part Number/Catalog No. | 1756-DHRIO |
| Series | ControlLogix |
| Module Type | Data Highway/Remote I-O Communication Module |
| Location | 1756 ControlLogix Chassis |
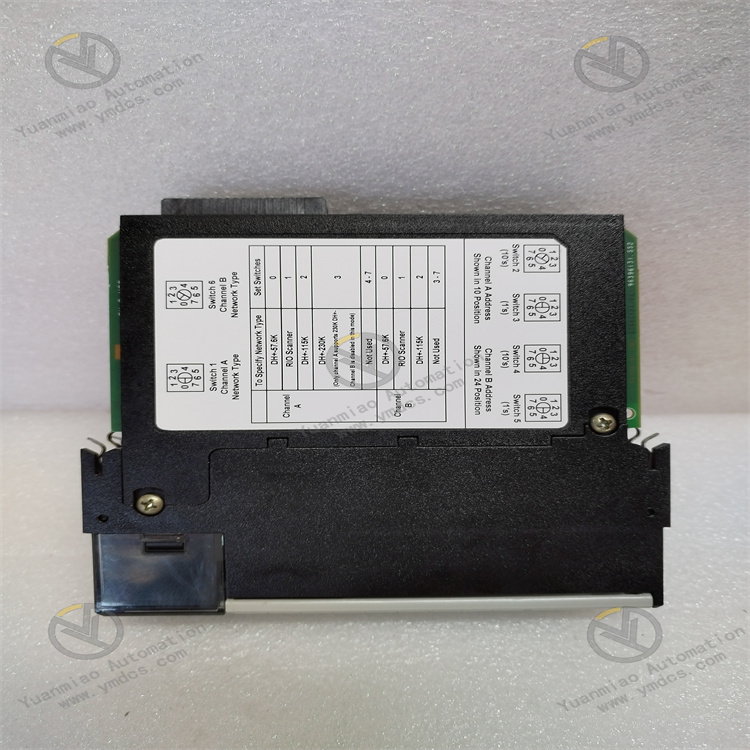
| Communication Speed | 57.6 Kbaud, 115.2 Kbaud, 230.4 Kbaud |
| Cable Length | 3048 m (10000 ft), , 1524 m (5000 ft),762 m (2500 ft) |
| Recommended Cable | Belden 89463 twinaxial, 0.52 mm² (20 AWG)rated at 200 °C (392 °F) |
| Backplane Current (5Volts) | 1.7 milliamps |
| Backplane Current (24 Volts) | 850 milliamps |
| Power Dissipation (Max) | 4.5 Watts |
| Thermal Dissipation (Max) | 15.4 BTU per hour |
| UPC | 10612598138361 |
| Enclosure | Open |
| Operating Temperature | 0-60 Celsius, 32-140 Fahrenheit |
| Slot width | 1 |
| Weight | 0.64 pounds (0.293 kilograms) |
| Spare Connector kit | Phoenix MVSTBR2.5/3-ST BK AU. |
Technical Parameters Number of I/O Points: It provides various configurations of the number of I/O points. For example, there may be different specifications such as 32 points and 64 points to meet the control requirements of different scales. Communication Interface: It supports industrial Ethernet communication protocols, such as EtherNet/IP, etc., which is convenient for communication with the main controller and other devices. Operating Voltage: It is usually 24VDC, which is a commonly used power supply voltage in the field of industrial automation. Operating Temperature Range: Generally, it can work normally in an ambient temperature range from - 20°C to 60°C. The operating temperature range of some models may be wider. Application Scenarios Automobile Manufacturing: In the automobile production line, it can be used to monitor and control various devices, such as the movement of robots, the position detection of items on the conveyor belt, and the on-off control of pneumatic valves. Food and Beverage Processing: It controls the filling equipment, packaging equipment, etc. on the production line, realizing accurate material conveying, precise control of the filling volume, and automated operation of the packaging process. Metallurgical Industry: It is used to monitor and control the operation status of large equipment such as blast furnaces and rolling mills. For example, it detects parameters such as the temperature, pressure, and speed of the equipment and makes corresponding control adjustments according to these parameters.
The relevant methods for its installation and maintenance are as follows: Installation Method: Preparation Work: Before starting the installation, make sure that the power supplies of all relevant devices have been turned off to avoid electric shock or device damage. Prepare the tools required for installation, such as a screwdriver, wrench, etc., and confirm that the model and specifications of the module are in line with the system requirements. Select the Installation Location: Choose a suitable installation location, which should have good ventilation conditions and avoid environments with high temperature, humidity, and strong magnetic fields. The module should be installed on a standard DIN rail, ensuring that the rail is firmly installed and horizontal. Install the Module: Slide the 1756-DHRIO module along the DIN rail until the buckle of the module is tightly engaged with the rail. Use a screwdriver to tighten the fixing screws on the module to ensure that the module is firmly installed. Connect the Power Supply: According to the wiring diagram of the module, correctly connect the 24VDC power supply to the power terminals of the module. Ensure that the polarity of the power supply is correct to avoid damaging the module due to reverse connection. Connect the Communication Cable: Use an appropriate communication cable (such as an Ethernet cable) to connect the module to the main controller or other relevant devices. Ensure that the cable is firmly connected to avoid looseness or poor contact. Connect the I/O Cable: According to the actual needs, connect the cables of the input and output devices to the corresponding I/O terminals of the module. Ensure that the wiring is correct to avoid short circuits or open circuits. When connecting the cables, cable clips or fixing devices can be used to fix the cables to prevent the cables from loosening or being pulled. Grounding: In order to ensure the safe and stable operation of the system, correctly ground the grounding terminal of the module. The grounding resistance should comply with relevant standards and specifications. Maintenance Method: Daily Inspection: Regularly check the operation status of the module and see if the indicator lights on the module are normally displayed. If the indicator lights flash abnormally or go out, it may indicate that there is a fault in the module, and further inspection is required. Clean the Module: Regularly clean the surface of the module to prevent the accumulation of dust, oil stains and other debris from affecting the heat dissipation and normal operation of the module. You can gently wipe the surface of the module with a clean soft cloth, and avoid using chemical solvents or corrosive cleaners. Check the Connections: Regularly check whether the power connection, communication cable connection and I/O cable connection of the module are firm. If there is any looseness or poor contact, tighten or reconnect it in a timely manner. Software Maintenance: Regularly update the firmware of the module to ensure that the module has the latest functions and performance. Before updating the firmware, back up the relevant configuration files and programs to avoid data loss. Troubleshooting: If the module malfunctions, first check the fault indicator lights and error codes on the module, and conduct fault diagnosis and troubleshooting according to the troubleshooting guide in the user manual. If you cannot solve the fault by yourself, you can contact the technical support personnel of Rockwell Automation or professional maintenance personnel for repair. Preventive Maintenance: According to the usage environment and frequency of the module, formulate a reasonable preventive maintenance plan. For example, regularly check the environmental parameters such as the temperature and humidity of the module to ensure that the module operates within the normal working range; regularly conduct performance tests on the module to detect potential problems in a timely manner and take measures to solve them.
Service Advantages:
✅ Original imports with quality assurance
✅ Ample stock for rapid delivery
✅ Professional team for technical support
✅ Global logistics for worry-free coverage
【 Disclaimer 】
We sell new products and discontinued products, independent channels to buy such special products. Guizhou Yuanmiao Automation Equipment Co., Ltd. is not an authorized distributor, dealer or representative of the products featured on this website. All product names/product images, trademarks, brands and microlabels used on this Website are the property of their respective owners. Descriptions, depictions or sales of products with such names/images, trademarks, brands and logos are for identification purposes only and do not imply any association or authorization with any rights holder.