Description
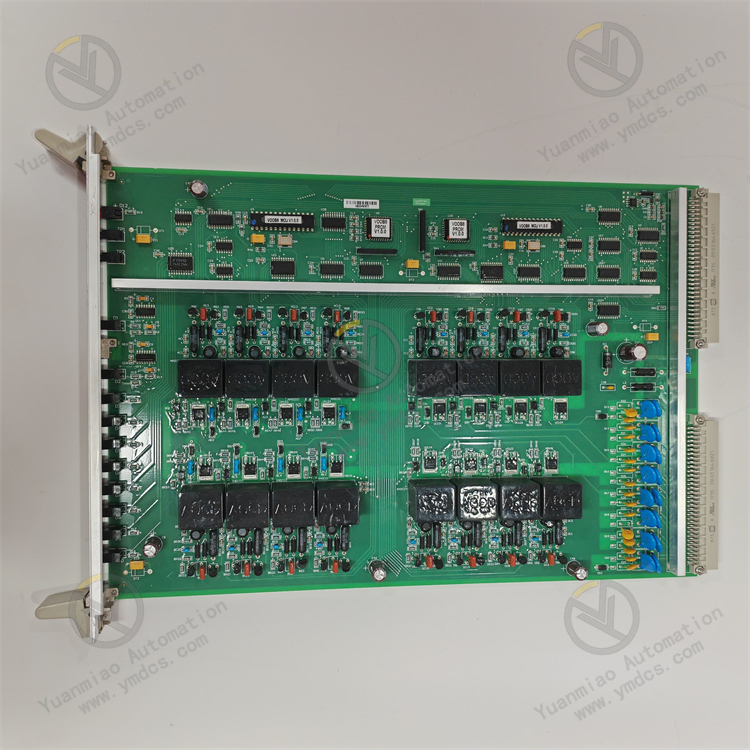
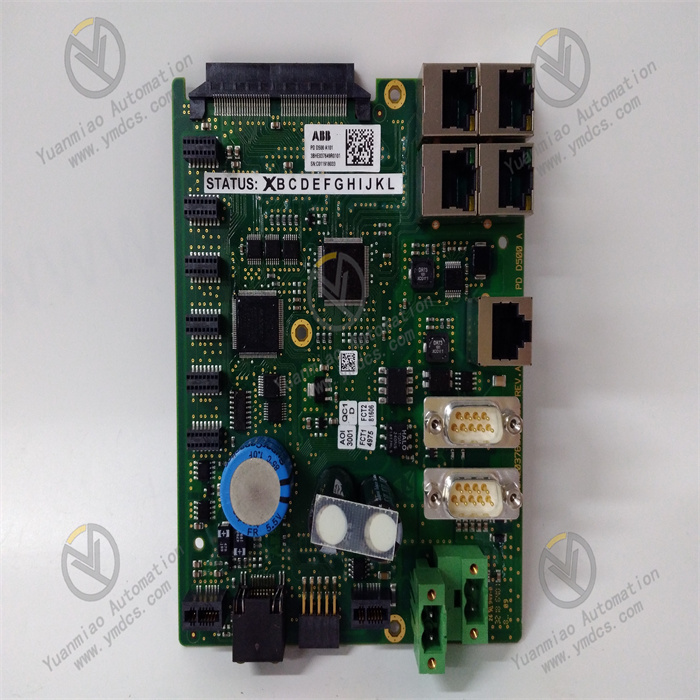
ABB FI830F 3BDH000032R1
Technical Parameters
Physical Characteristics
- Dimensions: Approximately 297.18mm×35.56mm×175.26mm.
- Weight: The net weight of the product is 0.26kg, making it easy to install and maintain.
- Mounting Method: Typically installed in industrial control cabinets, possibly using a standard DIN rail mounting method for quick and easy disassembly and replacement.
Electrical Characteristics
- Operating Voltage: Generally 220V, adapted to common industrial power supply voltages.
- Output Frequency: Data varies across sources, with claims such as 2Hz, 30kHz, etc.
Functional Features
- Communication Function: As a Profibus-DP V1 communication module, it enables high-speed and reliable data communication with other devices supporting the Profibus-DP protocol, ensuring seamless data exchange between various devices in industrial automation systems.
- Data Processing Capability: Features strong data processing capabilities, capable of parsing, converting, and processing input fieldbus data to provide accurate information for control systems. It can also convert control system commands into signal formats suitable for field devices, enabling precise control of field equipment.
- Diagnostic Function: Equipped with self-diagnosis, it can monitor its own operating status in real time. When a fault occurs, it promptly sends alarm signals and transmits fault information to the host computer or control system via the communication network, facilitating quick fault location and troubleshooting by maintenance personnel and improving system reliability and maintainability.
Application Scenarios
- Industrial Automation Production Lines: Widely used in various industrial automation production lines, such as automotive manufacturing, electronic device production, food and beverage processing, etc. Used to connect various automation devices on the production line, such as PLCs, sensors, actuators, etc., to achieve collaborative operation and automated control of devices.
- Process Control Systems: In process control fields such as chemical, petroleum, and power industries, it is used to connect each node in the distributed control system (DCS) to achieve real-time monitoring and adjustment of the production process. For example, it collects data from on-site sensors such as temperature, pressure, and flow, and sends control commands to on-site actuators such as control valves and frequency converters to ensure stable operation of the production process.
- Smart Factories: In smart factory construction, it serves as an important component for device interconnection and system integration. It can connect devices of different manufacturers and types to form a unified intelligent production network, enabling intelligent management and optimization of the production process.
How to Configure the ABB FI830F 3BDH000032R1 Module?
- Hardware Connection: Properly install the module in the corresponding control cabinet or equipment, and connect the power supply, communication cables, and terminals connected to field devices according to the instructions. Ensure secure connections to avoid looseness or poor contact.
- Bus Address Setting:
- Factory Settings Check: If the customer does not provide bus address information, the module may be factory-set to "126". Before startup, reset the address to a number within the valid range (0…125), and the selected address must be unique in the segment.
- Local Setting: The address can be set by unscrewing the module's front cover and finding the DIP switch on the digital board. The factory setting of DIP switch 8 is OFF, indicating fieldbus address setting, which can be changed as needed. The address can also be set via the menu using the keys on the display board.
- System Tool or Master Setting: The bus address can also be set through system tools or by using PROFIBUS DP Master Class 2 (such as Asset Vision Basic).
- Signal Mode Configuration (for Specific Application Scenarios): For non-explosion-proof devices or those operating in Zone 2, signals can be configured in "active" or "passive" mode. If the signal is configured in "active" mode, the current output does not require an external power supply; if configured in "passive" mode, an external power supply is required for the current output, similar to pressure and temperature transmitters. For devices operating in Zone 1, the current output configuration is usually specified at the time of order and generally cannot be reconfigured later. The correct current output design should be confirmed based on the markings on the device's junction box.
- Communication Protocol Setting: The module supports multiple fieldbus protocols such as Profibus DP, Modbus RTU, and Foundation Fieldbus. According to the actual application scenario and communication requirements with other devices, select and configure the corresponding communication protocol and parameters in the relevant configuration software or through the module's setting interface to ensure correct communication with connected controllers or other devices.
- Other Parameter Configuration: Depending on specific application requirements, other parameters such as signal filtering time and data update rate may need to be configured. These parameters can usually be adjusted through the corresponding configuration software or the module's setting interface. For specific configuration options and methods, refer to the module's technical manual.
- System Integration and Testing: After completing all configurations of the module, integrate it into the entire industrial control system. Then conduct system testing to check whether the module operates normally, including whether communication with the controller is normal and whether the collected or transmitted data is accurate. If issues arise, troubleshoot and debug according to error messages or fault phenomena until the module operates stably and reliably.
Common Faults and Solutions (Compiled for Typical Issues in Industrial Automation Scenarios)
1. Power-Related Faults
- Module Not Powered (Power Indicator Off)
- Possible Causes: Loose, disconnected, or reverse-polarity power connections; faulty power supply (e.g., damaged 24V DC power supply, unstable voltage); blown internal fuse (in some models).
- Solutions: Check power terminal connections to ensure correct positive/negative polarity (typically terminals 1+, 2-), and use a multimeter to measure whether the supply voltage is stable within the range of 20.4V~28.8V DC. Replace the backup power supply or repair the power supply circuit. If the module has a fuse, check and replace it after powering off (confirm if the model supports this).
- Abnormal Power Indicator (Flashing or Intermittent)
- Possible Causes: Harmonic interference or excessive ripple in the power supply; poor contact between the module and the backplane bus (loose rail mounting).
- Solutions: Install a filter capacitor (e.g., 100μF/35V) at the power input or use an isolated power supply to eliminate interference. Reinsert the module to ensure firm DIN rail mounting and good backplane bus contact.
2. Signal Acquisition Faults
- No Signal or Abnormal Values in Channels (e.g., Constant 0, Full Scale, or Fluctuations)
- Possible Causes: Faulty sensor or transmitter (e.g., open circuit, damage); incorrect signal cable wiring (e.g., reverse polarity, no grounding); incorrect signal type configuration (module parameters not matching the actual signal type, such as 4-20mA/0-10V).
- Solutions: Use a multimeter to measure the sensor's output signal to confirm normal operation (e.g., 4-20mA sensors require proper power supply). Check terminal connections (e.g., AI1+, AI1-) to ensure correct polarity and single-point grounding of the shield (following anti-interference specifications). Enter the module's parameter settings via ABB programming software (such as Control Builder M) to confirm that the channel signal type (current/voltage) and range (e.g., 0-20mA, 0-5V) match the actual conditions. Replace with shielded twisted-pair cables, avoid parallel routing with high-power cables, and maintain a distance of over 30cm.
- Large Signal Accuracy Deviation (Measured Value Does Not Match Actual Value)
- Possible Causes: Uncalibrated module or expired calibration (requires regular calibration); excessive signal cable length causing attenuation (e.g., voltage signal transmission exceeding 100m); high common-mode voltage (exceeding the module's allowable range, such as ±10V).
- Solutions: Calibrate the module using a high-precision signal source (via software or hardware calibration functions). Replace voltage signals with current signals (4-20mA) to reduce long-line attenuation, or install a signal amplifier. Check whether the sensor's grounding is common with the module, and use an isolated transmitter to isolate signals if necessary.
3. Communication and Configuration Faults
- Module Unable to Communicate (Controller Cannot Read Data)
- Possible Causes: Incorrect backplane bus address setting (e.g., module slot number in the rack does not match the configuration); faulty communication bus (damaged cable, oxidized connector); incompatible module firmware version with the controller.
- Solutions: Confirm the module's slot address (e.g., Slot 3) in the programming software matches the actual installation location, and redownload the configuration. Replace the communication cable or clean the bus connector, and check whether the bus termination resistor is correct (e.g., Profibus termination resistor dipswitch). Upgrade the module's firmware to a version compatible with the controller (refer to ABB official documentation).
- Data Transmission Interruption or Errors
- Possible Causes: Incorrect communication parameter settings (e.g., baud rate, parity, data bits); module overload or channel configuration exceeding maximum load (e.g., using all channels simultaneously without enabling filtering).
- Solutions: Verify that the communication parameters of the module and controller (e.g., Profibus baud rate set to 1.5Mbps) are consistent. Reduce the number of simultaneously used channels or enable channel filtering (lengthen the sampling period to reduce interference effects).
4. Hardware and Environmental Faults
- Module Overheating or Temperature Indicator Alarm
- Possible Causes: Poor ventilation in the control cabinet, ambient temperature exceeding the rated range (e.g., >60°C); overly dense module installation with insufficient heat dissipation space.
- Solutions: Check whether the control cabinet fan is operational, add cooling fans or air conditioning to ensure the ambient temperature is within -25°C~+60°C. Adjust module installation spacing to follow ABB's recommended heat dissipation spacing (e.g., 20mm left/right clearance).
- Loose Connections or Module Dislodgment Due to Vibration
- Possible Causes: High industrial site vibration (e.g., near compressors, machine tools), insecure fixing.
- Solutions: Reinforce DIN rail mounting with spring washers or lock screws, and regularly check terminal tightness. For severe vibration scenarios, consider using shock-absorbing brackets or flexible cable connections.
5. Advanced Fault Handling
- Channel Damage or Hardware Failure (e.g., Burning, Smoke)
- Possible Causes: External high-voltage surges (e.g., accidental 220V power connection) or surge voltages exceeding the isolation rating.
- Solutions: Power off immediately, replace the damaged module, and check for leakage or short circuits in front-end equipment. Install surge protection devices (SPD) at signal inputs, especially in high-voltage or outdoor scenarios.
- Redundancy Configuration Failure (e.g., Single Module Fault in Dual-Module Redundancy)
- Possible Causes: Incorrect redundancy link wiring or inactive configuration.
- Solutions: Check the synchronization cable connection of the redundant module and ensure redundancy is enabled in the configuration (e.g., set to master/slave mode).