Description
Features and Functions
Wide Range of Applicable Environments: Suitable for various industrial environments such as power, petroleum, and chemical industries. It can withstand harsh conditions and offers high stability and reliability.
Powerful Performance: Equipped with excellent data switching and processing capabilities, supporting multiple network protocols such as 802.3, 802.3u, and 802.3x. It has an auto-negotiation function to automatically identify and configure connected devices, enabling fast transmission of large volumes of data.
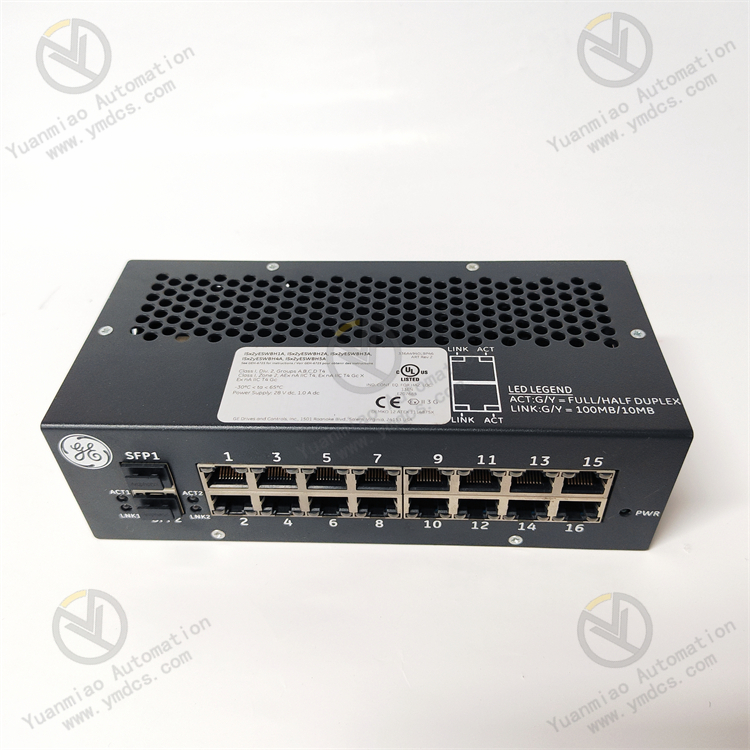
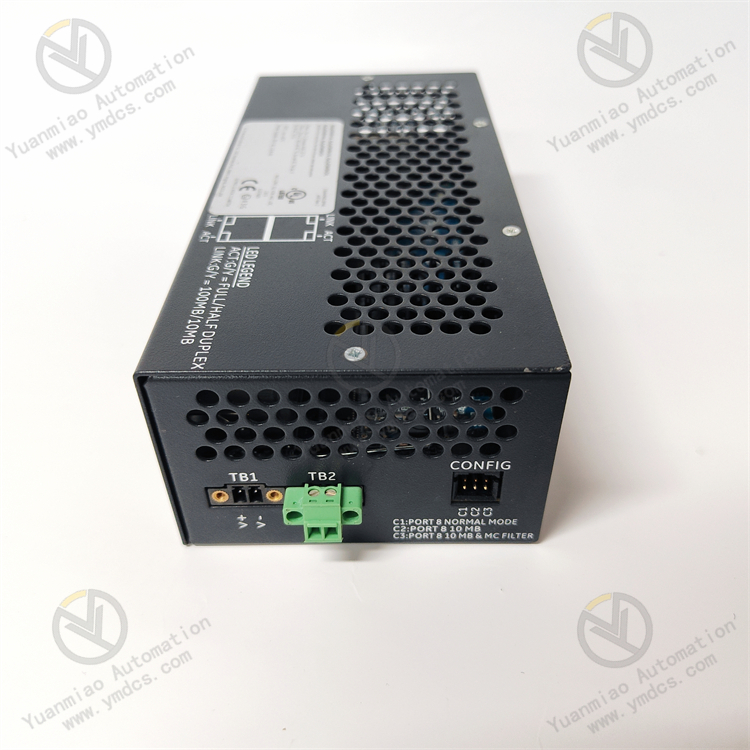
Efficient Data Transmission: Supports 10/100Base-TX RJ45 ports with 16 copper ports and sufficient buffer space. Each port can buffer one packet, improving transmission efficiency.
Secure and Reliable: Without fiber ports, the 16 copper ports ensure secure and reliable data transmission. It also has indicator functions for link presence, activity, and duplex status, facilitating problem localization.
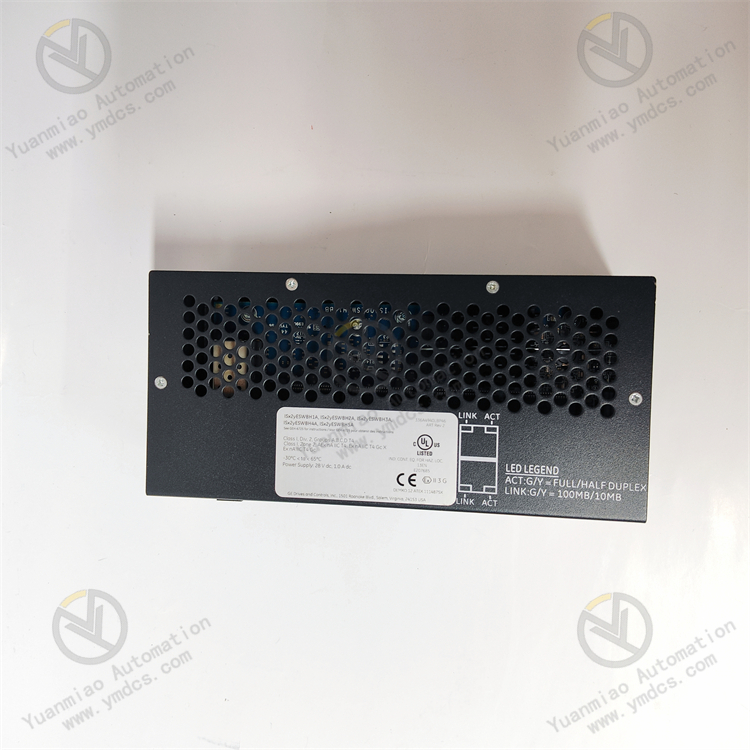
Easy Installation and Maintenance: Can be installed via DIN rail or panel. DIN rail installation requires 259B2451BVP1 and 259B2451BVP4 clips, while panel installation only needs screws. It features a simple user interface for easy configuration and maintenance.
Wide Range of Applicable Environments: Suitable for various industrial environments such as power, petroleum, and chemical industries. It can withstand harsh conditions and offers high stability and reliability.
Powerful Performance: Equipped with excellent data switching and processing capabilities, supporting multiple network protocols such as 802.3, 802.3u, and 802.3x. It has an auto-negotiation function to automatically identify and configure connected devices, enabling fast transmission of large volumes of data.
Efficient Data Transmission: Supports 10/100Base-TX RJ45 ports with 16 copper ports and sufficient buffer space. Each port can buffer one packet, improving transmission efficiency.
Secure and Reliable: Without fiber ports, the 16 copper ports ensure secure and reliable data transmission. It also has indicator functions for link presence, activity, and duplex status, facilitating problem localization.
Easy Installation and Maintenance: Can be installed via DIN rail or panel. DIN rail installation requires 259B2451BVP1 and 259B2451BVP4 clips, while panel installation only needs screws. It features a simple user interface for easy configuration and maintenance.
Technical Specifications
- Operating Temperature: -40°C to 70°C.
- Input Voltage: 24/28 VDC.
- Cooling Method: Convective cooling.
- Dimensions: Height 18.8cm, Width 8.6cm, Depth 5.6cm.
- Weight: Approximately 2 lbs (0.91kg).
Installation and Usage
Installation Methods: Choose between DIN rail or panel installation. For DIN rail installation, use the specific 259B2451BVP1 and 259B2451BVP4 clips; panel installation is simpler, secured with screws.
Device Connection: Connect various network devices (e.g., computers, PLCs, sensors) via 10/100Base-TX RJ45 ports to enable data transmission and communication between devices.
Configuration and Management: Configure through a user-friendly management interface to set network parameters, port parameters, etc. Monitor and manage the switch’s operating status, such as viewing port activity and link status.
Application Fields
The IS420ESWBH3A is widely used in industrial automation, energy, transportation, manufacturing, and other fields. It meets these industries’ needs for reliable, efficient, and secure network communication, providing stable data transmission and real-time control functions.
Configuration Methods for GE IS420ESWBH3A Switch
Configuring via Console Port
- Set up a local configuration environment by connecting the serial port of a microcomputer (or terminal) to the switch’s Console port using a configuration cable.
- Run a terminal emulation program (e.g., HyperTerminal for Windows 9x) on the microcomputer. Set the terminal communication parameters as follows: baud rate 9600bps, 8 data bits, 1 stop bit, no parity, and no flow control. Select the terminal type as VT100.
- Power on the Ethernet switch. The terminal will display the switch’s self-check information. After the self-check, the system will prompt you to press Enter, followed by a command-line prompt.
- Enter commands to configure the Ethernet switch or view its operating status.
Configuring via Telnet
- First, configure the Telnet username and authentication password on the switch through the Console port. By default, Telnet users are required to authenticate with a password. If no password is configured, attempting to log in via Telnet will trigger the prompt: “password required, but none set.”
- Set up the configuration environment by connecting the microcomputer’s Ethernet port to the switch’s Ethernet port via a local area network.
- Run the Telnet program on the microcomputer, enter the IP address of the VLAN to which the Ethernet port connected to the microcomputer belongs, log in to the Ethernet switch, and configure the switch.